The Setting
(Continued from Prelude)
Thane Volgrim sends a few of his soldiers to Boulder Pass Mine with a message concerning his imminent reclaiming of the site. After being received by the owner of the mining operation, and much arguing over the thane’s ancestry and the squatting rights of the human miners, the magistrate of Strausbruck is sent for. Two days later the messengers return to the dwarf camp with news that the magistrate, not wanting to antagonize a people often thought of as the Empire’s closest allies, has ceded the rights of the mine to Volgrim until review of the matter can be put in front of the Count of Stirland.
Back in Strausbruck, the small town is filled with angry unemployed miners and townspeople who are now looking forward to a hungry winter as they will be unable to stock their foodstores with the mining income the town has become reliant on. While the magistrate and the local nobles are well prepared for this small setback and sit comfortable in their town houses, a warrior priest by the name of Ludwig Ketz is observing the anger and despair of his flock. Ludwig quickly forms a plan to fight this injustice and begins preaching in the pulpits and streets, denouncing the unjust demands of the dwarf warband, and calling the magistrate a coward who is too fearful to face the greedy interlopers. As a true son of Sigmar, he coordinates an armed effort with a few sergeants of the local state army, who garrison the town’s defences and patrol the imperial roads, and is even able to attract a group of Knights of the Black Bear, always up for a good fight, who happened to be passing through the town. Even the magistrate’s personal advisor from Altdorf, Hazim Hammad, a wizard of the Light Order, offers his services when he learns of Ludwig’s attempt to reverse the townspeople’s misfortune.
On the day the magistrate agreed to relinquish the mine to the dwarfs, Volgrim leads a force of warriors up to the mine, intent on securing the area and clearing out any lower levels that might have attracted goblins or other fouler creatures. His small contingent consists of Blackstone and Bronzemonger clan warriors, plus a regiment of Ironbreakers, instrumental in tunnel fighting, who serve as the thane’s personal guard, most of them being Blackstone dwarfs, and all of them being old friends of Volgrim’s from back when he served his hold as an Ironbreaker himself. The infamous Dragon Slayer, Gurni the Grobistriker, also volunteered his axe for the effort.
As the dwarfs rounded into the pass, Volgrim was angered to see an army of men, dressed in the colors of Stirland, with spears and halberds pointed at them, blocking their entry to the mining site. At the head of this force is a robed warrior priest of Sigmar who yells defiance towards the dwarfs, bringing cheers from the soldiers surrounding him. Thane Volgrim, angered by their apparent disregard of their lord’s promises and their willingness to take up arms against him in his own great-grandfathers mining site, is too enraged to pursue further diplomatic solutions with these men. He decides he will claim what belongs to the dwarfs right now….
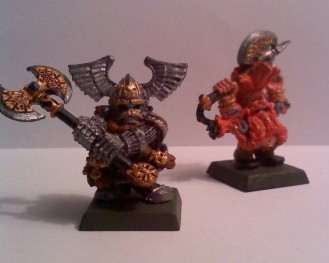
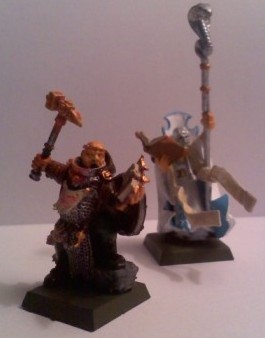
Thane Volgrim and Gurni the Dragonslayer Warrior Priest Ludwig and Hazim of the Light College
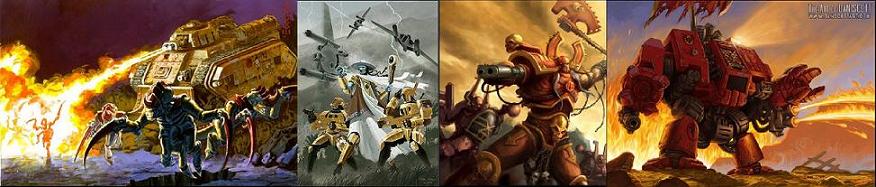
Axes vs Books
The Battle


The Dwarf Army List The Empire Army List
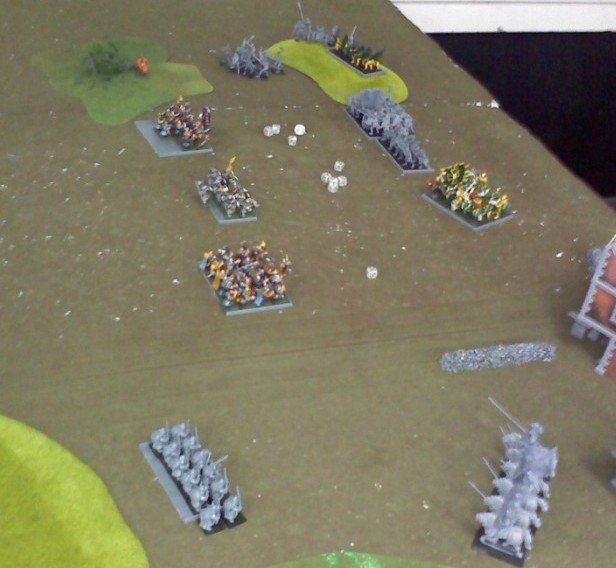
Deployment - I (Brian) put the Thane and his Ironbreakers in the center flanked by Warriors on each side, Cannon and Thunderers on the hill and Gurni, my Dragon Slayer, ready to run through the woods, hopefully giving him enough protection to make it far enough to charge some manlings. Ryan places his Empire Spearmen (with detachment) and Halberdiers across from my infantry with Hazim on one flank and his ranged units on the other, mirroring my own hill. His knights are placed a little out of the bottom right hand of the picture and his scounting Huntsmen are placed nice and close to my slayer in the woods.

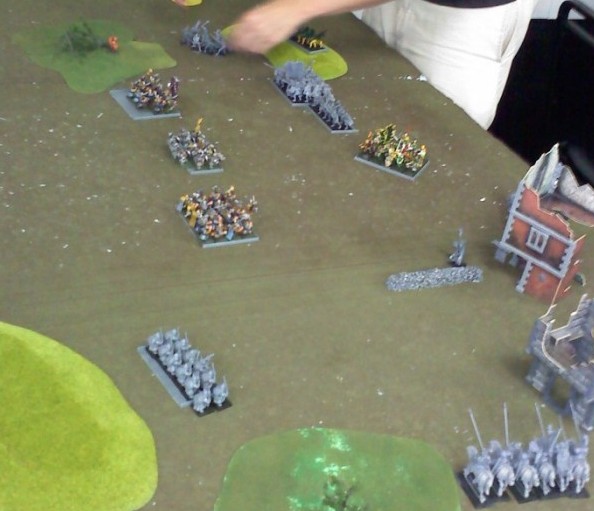
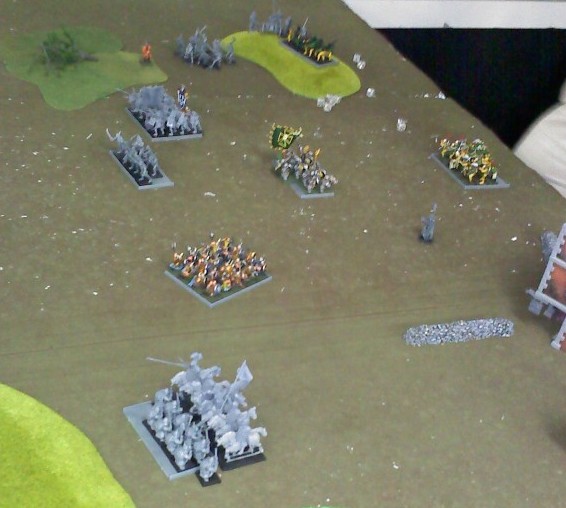
1st Turn - My dwarfs move first and advance as far as they can. My cannon misfires and explodes (Maybe they were not prepared for the battle? Hasty loading job? Whatever the case, the crewmen payed for their mistake.) and the Thunderers move up to get within range and also protect the flank of my army with handgun fire or a charge in the future. Ryan responds by meanuvering his infantry to make sure he can get the charge whenever I finally reach him. He also runs and guns with the Huntsmen, keeping them away from the slayer, and is able to pick off a few warriors on the left flank with them and the Handgunners while the mortar and Hazim's Burning Gaze have no luck against the Ironbreakers. Hazim continues to have trouble getting past the dwarf dispell dice for most of the game (the below picture is actually half way through 2nd turn.).
2nd Turn - My dwarfs keep moving up, Thunderers hit a couple of Halberdiers. I wish I had a cannon. Getting a little scared about the knights. Ryan continues to shoot at me, taking two Ironbreakers (due to the Handgunners) and a Warrior, and continues to delay the close combat.
3rd Turn - My Dwarfs advance again until they are right in front of the Empire infantry. I wheeled my Warriors on the right flank around to help the Thunderers face the Knights, praying the gunners would survive the charge. I move the Dragon Slayer to the edge of the woods, giving him one more turn in soft cover. Ryan charges the Spearmen, with detachment, into my left flank Warriors, and his Halberdiers, with Ludwig the Warrior Priest, charge my Thane and Ironbreakers. And of course the Knights charge the Thunderers. Before close combat, Gurni pulls a Neo and takes only one wound from the Empire Handgunners and Huntsmen who decided to stay put and shoot (Toughness 5 is nice). The mortar shot flies clear of any dwafs and Hazim fails a Cleansing Flare attempt, allowing me to easily dispell Ludwig's attempt at praying his unit into Unbreakableness. Resolving the combats, my Thunderers, failing to do any damage with their stand and shoot, take 2 casualties from the knights charge and admirably stay to fight some more. In the center of the battlefield, I qucikly make a challenge with Volgrim, which Ryan accepts with Ludwig. As the two generals face off, Ludwig lands one hit with the Hammer of Judgement which Volgrim passes and shrugs off with his Toughness 5 and then cleanly deals 2 wounds to Ludwig with his great axe (he decides killing the pathetic Warrior Priest would be too great a mercy and knocks him out of the fight with the flat of his axe) ending the challenge. The Halberdiers do poorly in the combat against the Ironbreakers, even with the hatred given to them by the Warrior Priest, and break, fleeing with my Ironbreakers in very slow pursuit. On my left flank, however, after a good round of combat with a few casualties on both sides, the great weapon wielding Warriors of the Blackstone clan, hit in their flank by the detachment, decide that pulling back out of the fight is a good idea (they failed their break test). Unfortuntately for me they were not fast enough and were routed and scattered.
4th Turn - I reform my general and Ironbreakers to face the Spearmen, hoping that the Halberdiers will keep up their run off the board. I manuever my remaining Warriors into a postion for a rear charge on the Knights and I charge the Huntsmen with the enraged Gurni. Gurni kills two Huntsmen while remaining alive, but the Huntsmen do not run. My thunderers survive and hold through another round of combat with the knights. On Ryan's turn, the Halberdiers do continue to run off the board (other than the fate of my cannon, I think luck was on my side) and he reforms his Spearmen and detachment to face my Ironbreakers. The handgunners take out an Ironbreaker. In the combat phase, Gurni takes out another Archer before succombing to blood loss from the numerous arrow, bullet, and knife wounds (he loses his final wound to the Huntsmen's attacks), and the Thunderers and Knights bang on each other for another round.
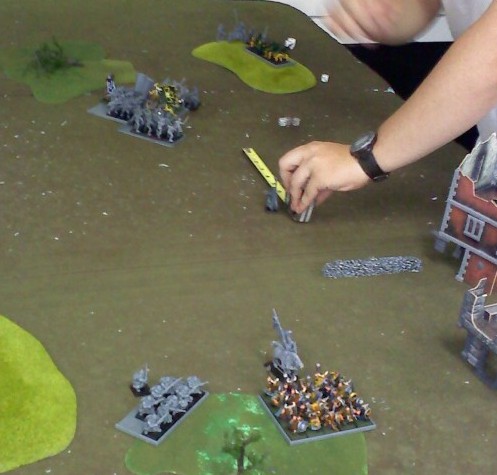
5th Turn - The Ironbreakers charge the Spearmen, and are counter charged by the detachment. My warriors hit the Knights in the rear. The Ironbreakers kill some spearmen while avoiding any casualties of their own, but still lose the combat and pass their break test. The Knights fail theirs and run to the edge of the board. During Ryan's turn, his handgunners sit useless for the minute while his archers charge the other flank of the Ironbreakers and he maneuvers his Battle Wizard in postion for a Cleansing Flare at the Ironbreakers (which is dispelled). The Ironbreakers are then able to deal out 4 wounds while making all of their 2+ armour saves, winning the combat. The Huntsmen break from the combat. (Picture below is from the middle of the 5th Turn)
6th Turn - I move around my dwarfs on my right flank to make sure I capture both table quarters on that side(that knight behind my Warriors above is their captured standard), As the Ironbreakers fight on with the Spearmen and Free Company, winning combat but failing to break the stubborn (not actually Stubborn) Spearmen and detachment. Ryan is able to rally his Huntsmen and fire on my remaining dwarfs with his mortar, actually taking out 2 of my dwarf Warriors from across the board, but it is not enough to cause any panic tests. The Ironbreaker/Spearmen combat amazingly continues without a break.
Conclusion
Victory Points
Dwarfs - 963pts
463pts of slain or routed Empire units
200pts of captured standards
100pts of slain enemy general
200pts of captured table quarters
Empire - 425pts
325pts of slain or routed Dwarf units
100 pts of captured standards
538pts difference: Solid Victory in favor of the Dwarfs
After seeing Ludwig put down so easily by the gromril covered dwarf leader, and unable to break the tenacious Ironbreakers the state troops of Strausbruck pull back from the pass and retreat to the town, the halberdiers managing to escape with the unconscious body of Ludwig Ketz and his magic hammer. Before returning to face the scrutiny of the magistrate and his council, Hazim advises the surviving sergeants of the guard to have some of the town's Huntsmen keep an eye on the Dwarfs but not to pursue any other conflict. He assures the townsfolk that eventually the nobles will see reason and do something about the town's misfortune.
Volgrim quickly regroups his warriors and secures the mining site. Due to the losses from the unexpected battle and the need to now guard the mine from the unpredictable humans, he would not be able to clear out the mines as he had planned, but he should still be able to get the upper levels running quickly. With a mix of relief at not having died at the hands of puny humans and despair at not acheiving his doom once again, Gurni the Grobistriker survives under the care of the dwarf physicians back at Volgrim's base camp.